Corsfix Quick Start Guide
On This Page
With Corsfix, you can bypass CORS errors quickly and get back to building your app. In this guide, you’ll learn how to get started, take advantage of some features like header override and cached responses, and set up your application for production.
1. Getting Started with Corsfix
First things first, head over to the Corsfix dashboard and sign up for a free account. Once you’re in, explore the playground where you can make test requests to your target API. This is the perfect space to see Corsfix in action before integrating it into your project.
- Sign Up & Explore: Create your account and start using the playground.
- Test Your API: Enter your target API endpoint and run a test request.
- Copy the Code: Once your test is successful, simply use the “Copy” button to grab the generated code snippet for your project.
Try running your request with Corsfix now, congrats, you’ve just made your first successful request!
Corsfix Playground
2. Use Advanced Features
Header Override
Sometimes, you might need to override certain headers, maybe to bypass restrictions on forbidden headers. With Corsfix, you can do this easily:
- How It Works: Just add the header override option to your request.
- Practical Use: If your API call requires sending headers that are normally blocked, Corsfix lets you set these without hassle.
Cached Response
If you find yourself hitting the same resource repeatedly, caching can save you time and throughput.
- Enable Caching: Activate the cached response feature to cache proxied responses.
- Performance Boost: This feature reduces redundant calls and speeds up your application.
For more details on configuring these features, check out our detailed documentation.
3. Setting Up for Production
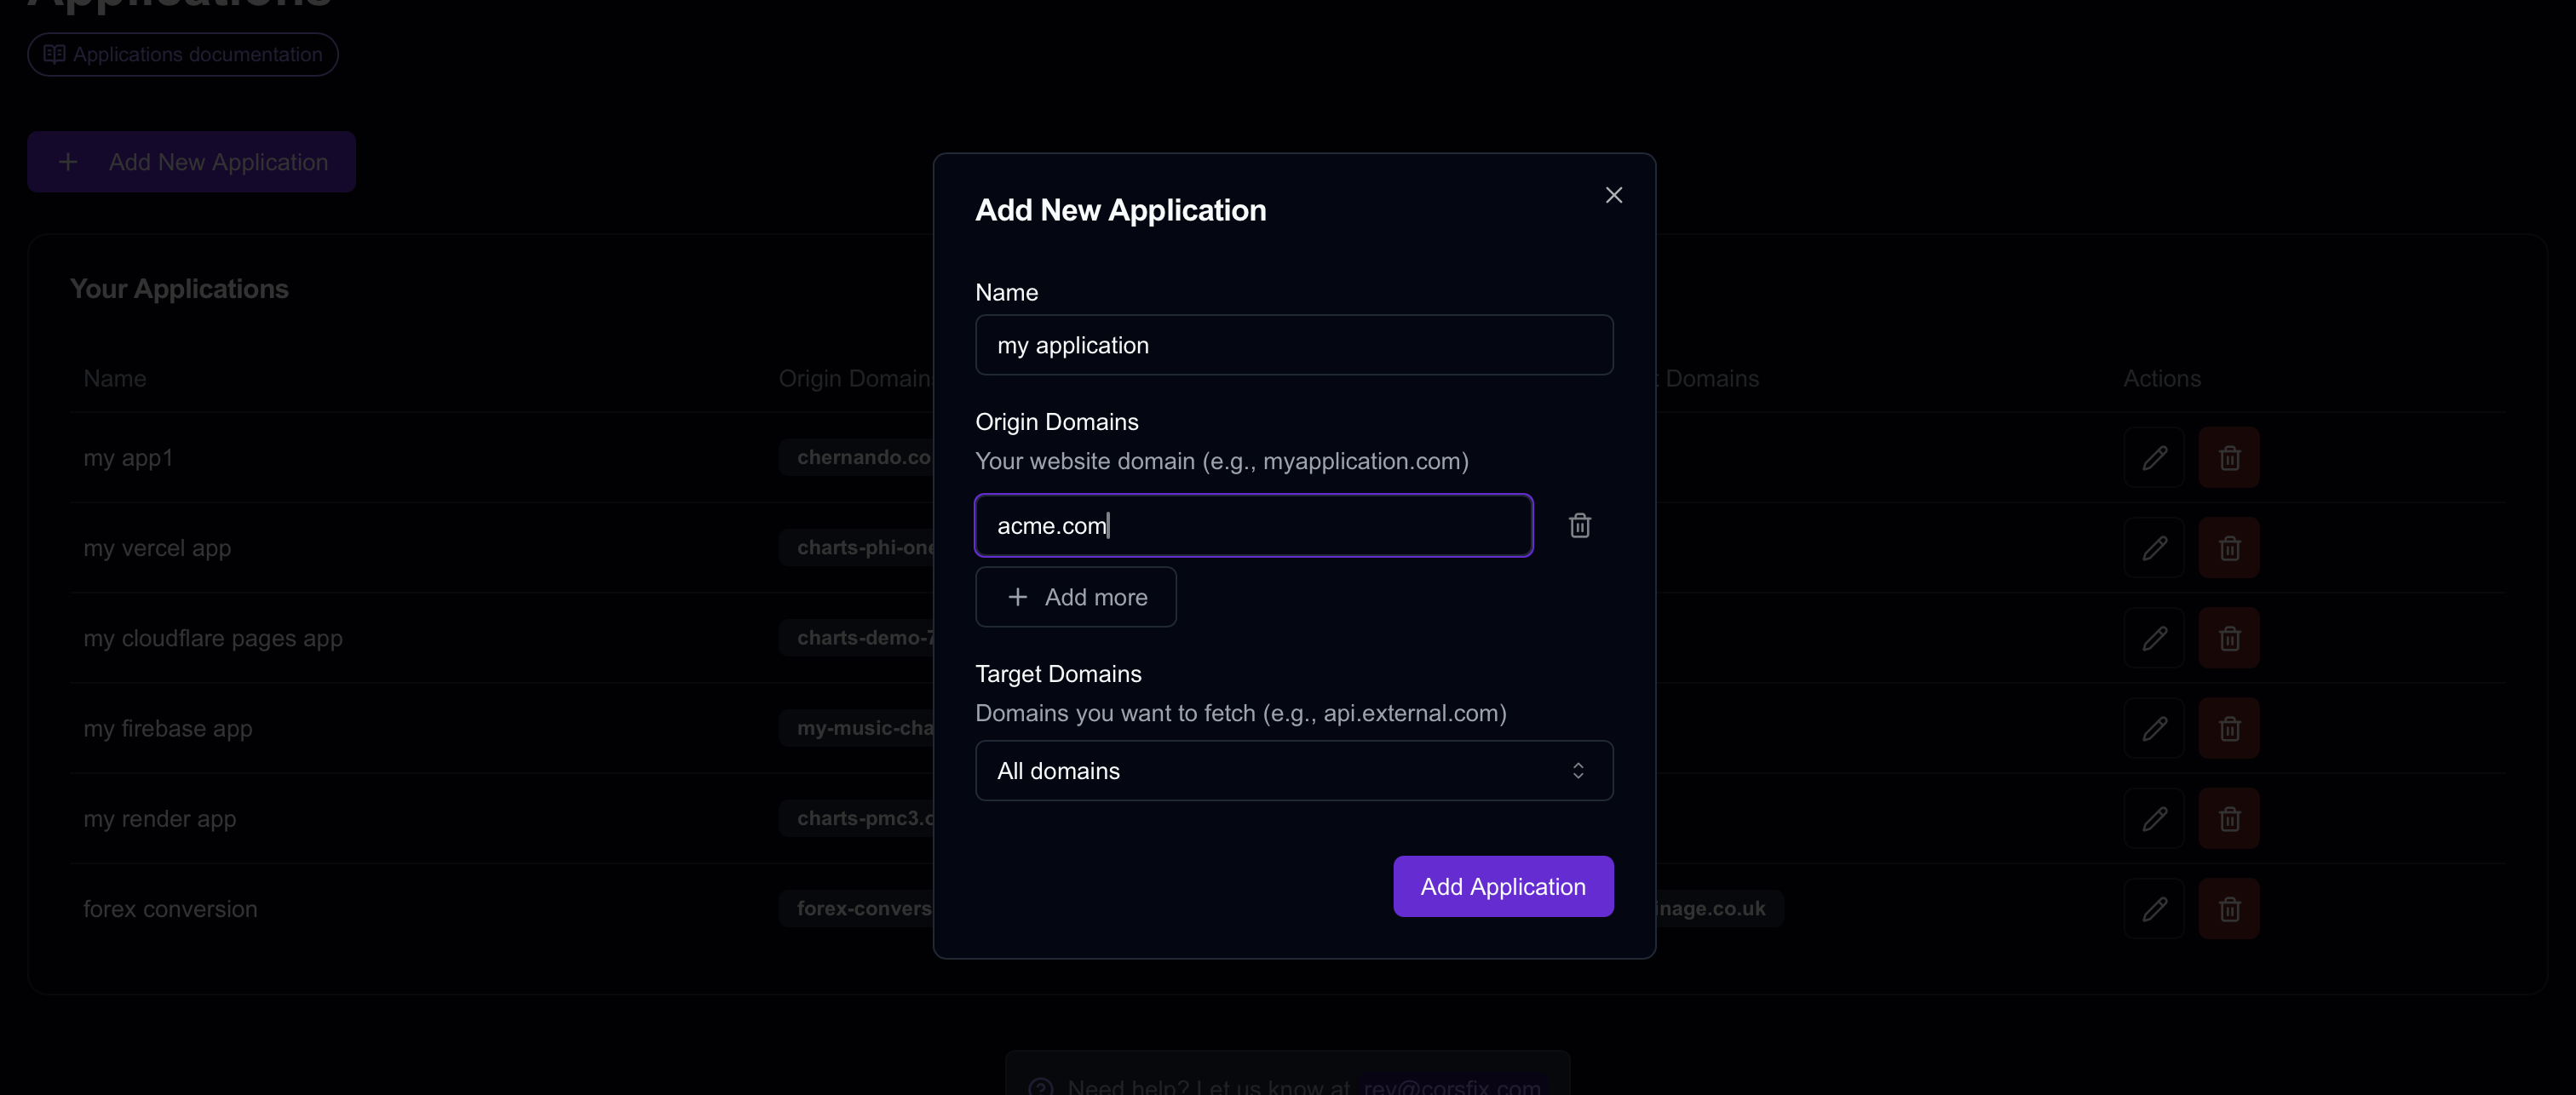
When you’re ready to move beyond development, Corsfix scales with you. Here’s how to add your application for production:
- Choose a Plan: Select one of the available plans that best fits your needs.
- Application Setup: During the setup, you’ll be asked to provide:
- Application Name: What you’d like to call your app.
- Allowed Origin: The production origin of your application (e.g.,
https://yourapp.com
). - Allowed Domains: The domains from which your application will fetch data. You can allow multiple domains, or simply use an asterisk (
*
) to allow any domain.
This flexible setup lets you handle multiple origins and domains per application, ensuring that you have the control you need for a robust production environment.
Adding Application
Wrapping Up
With this guide, you’re well on your way to mastering how you handle CORS errors in your projects and use Corsfix to its full potential. For more details, go to our documentation or check out some of our helpful articles on the blog.